
Tips For Taking Great Rental Property Photos
The adage, “you only get one chance to make a first impression,” is never truer than when you are trying to get a prospective tenant to view your rental listing. Photos are the first thing someone sees when searching for their next apartment or home. Most people will not even look at an online ad without pictures. Having photos that capture the renter’s interest often can be the difference between them wanting to know more or moving on to the next listing. Here are some tips for taking your best photos of your rental property.
Always remember, if you want great pictures of your listing, the care, time, and diligence you take when photographing your property is crucial.
Lights, camera, action! The director’s traditional call before a film take. Let us look at how these come into play in your rental listing photo shoot.
Lights
You can have the best camera and the most stunning rooms to photograph, but nothing matters without light. Good photos are all about lighting. Without enough lighting, the rooms may appear blurry and gloomy. Light can dramatically impact the feel of a photograph. Natural light, or light from the sun, is best for making your space look bright and inviting. Take photos of your property on a bright sunny day and supplement the natural light by turning on indoor lights and opening blinds or curtains. This can also make your space feel bigger. If there are areas where natural light is unavailable and lighting in the room is not sufficient, you may have to use a flash. I will discuss how best to use a flash in the camera section.
Camera (& Accessories)
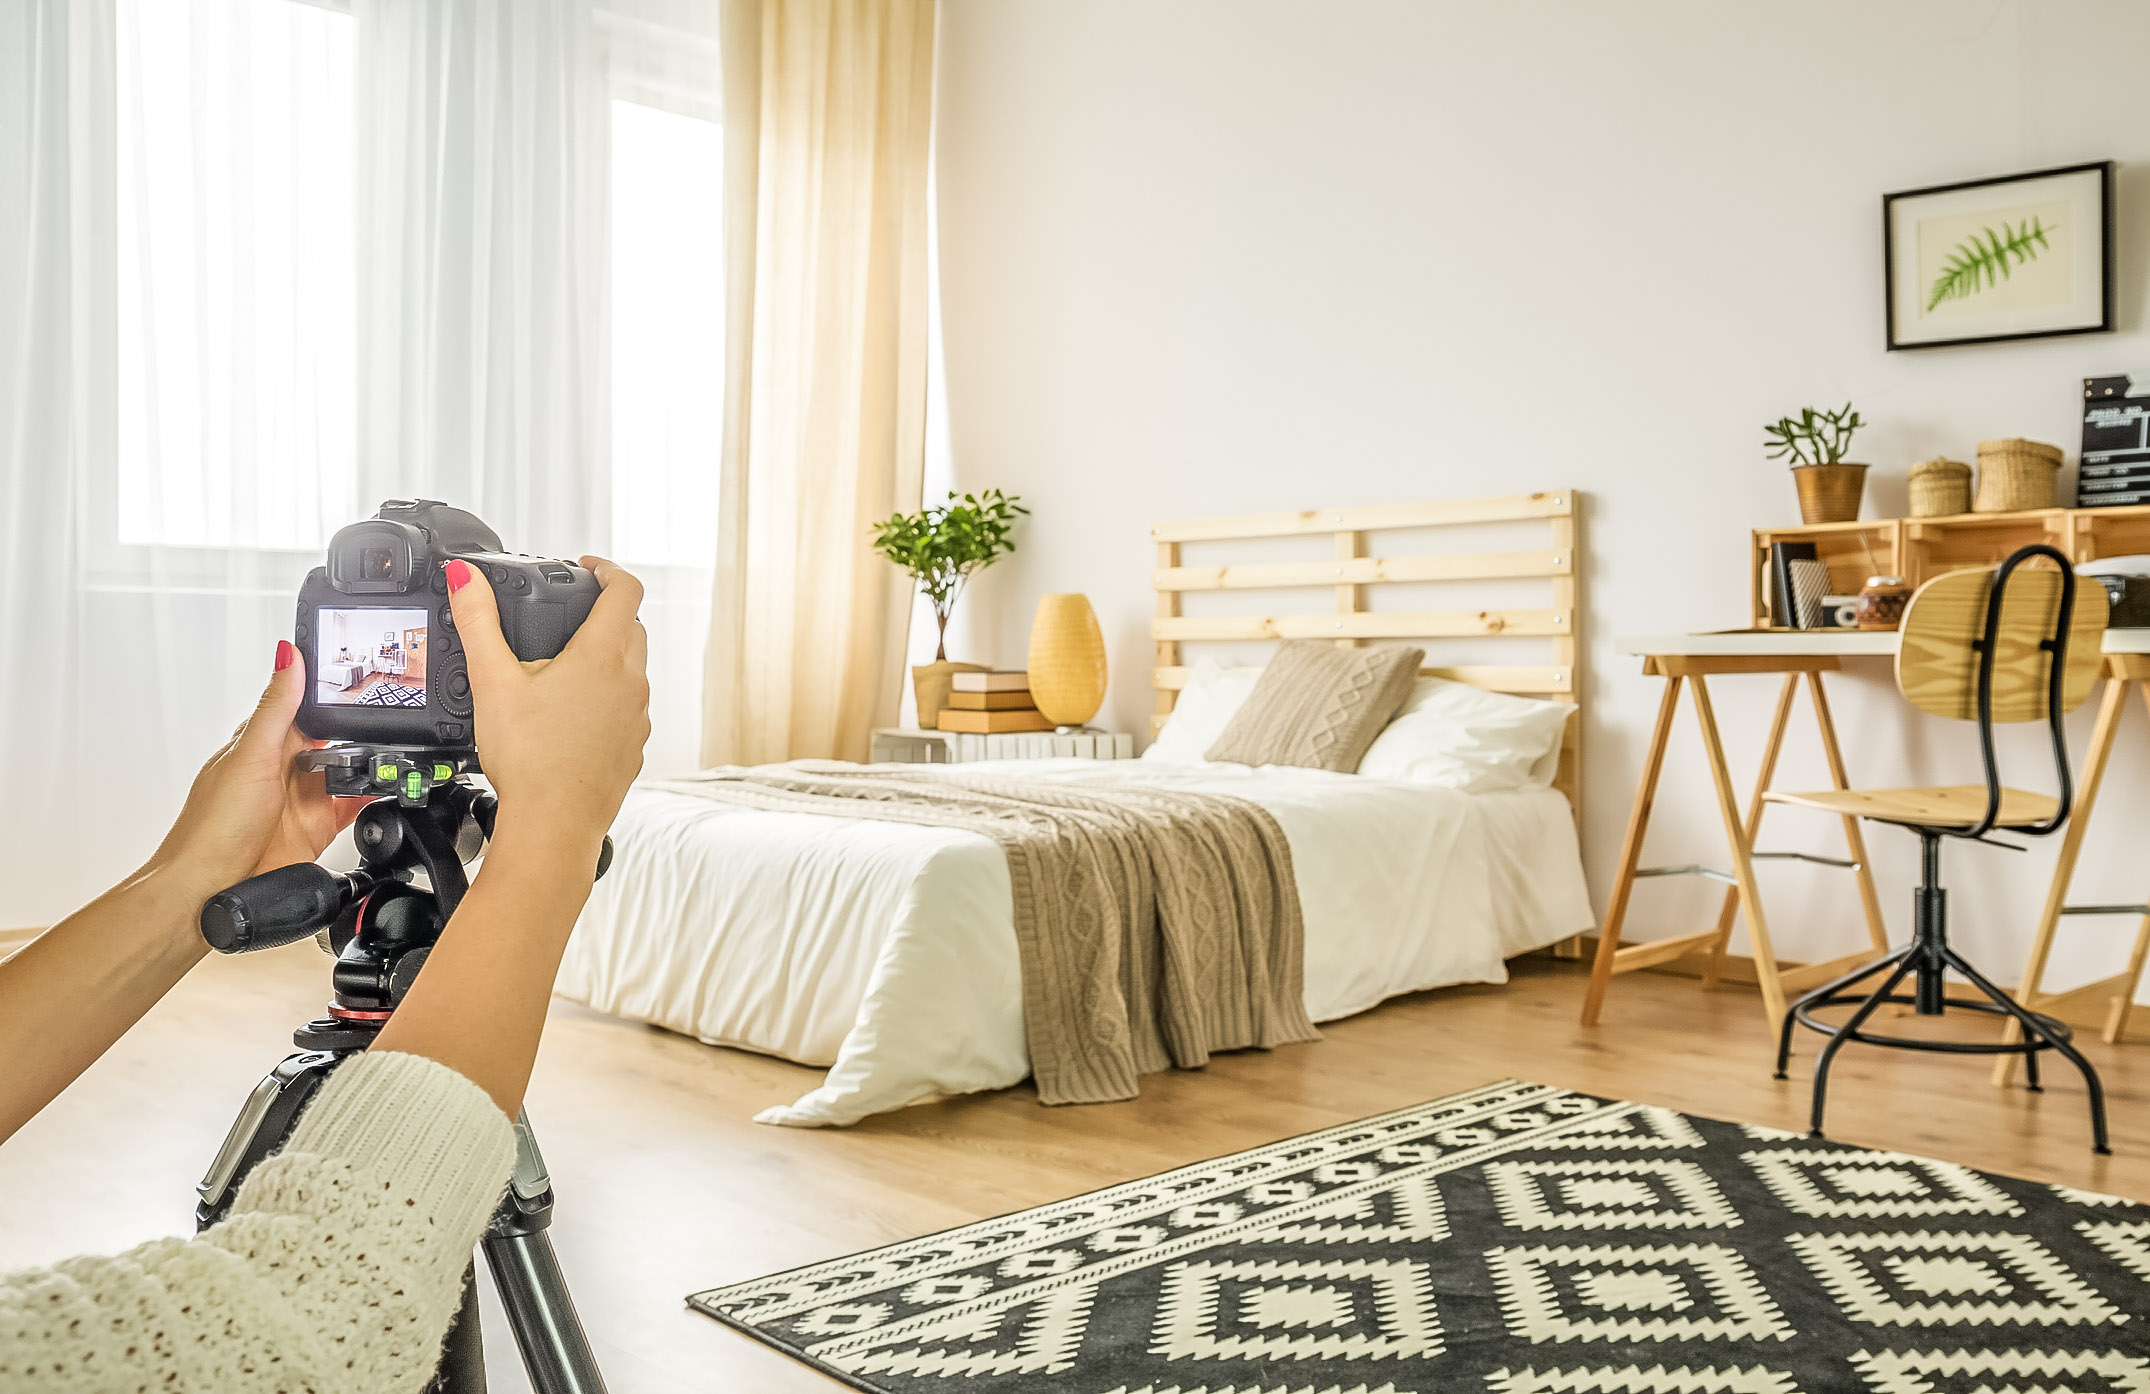
When considering equipment, a DSLR camera will give you a more professional look, higher quality, crisper images, and the ability to capture wider angles. However, today’s point and shoot or smartphone cameras can get the job done.
Whatever the camera you choose, I highly recommend using a tripod where you need your scene to be as sharp as possible, especially in low light conditions. The one I use supports both my DSLR and iPhone and comes with a Bluetooth remote. To check it out click here. 
Even with well-lighted rooms, using a tripod eliminates the chance of blurry or less than clear, sharp images. If the interior has less than ideal lighting conditions, it is even more crucial to use a tripod.
In some cases, a flash may be required. Most flashes are quite intense and can make your interiors look flat, unnatural, or over-exposed. With a DSLR camera, you can attach an on-camera external flash (compared to a built-in flash which is integrated into many point & shoot and phone cameras). You can then aim your flash up and “bounce” it off the ceiling to illuminate the room much better.
When taking photos of the rooms inside of your rental property, it is vital to have the right angles. Photos generally look better when your camera sits lower than eye level. In kitchens and bathrooms, shoot just above the top of the counters. Try to position your camera below shoulder height and adjust until the walls are vertical and straight. (This is another reason to invest in a tripod, to keep your photos consistently at the right level.)
Make sure the camera is shooting level. Use the grid feature on your camera or iPhone display to make sure your frame is parallel. Avoid strange angles and do not aim the camera too high or too low, leading to converging lines or a distorted image. With a DSLR, it is advantageous to use a wide-angle lens but be careful when going beyond 22mm or using an ultra-wide lens that can distort the room. With a smartphone (I use an iPhone 12Pro) , you can experiment with the panoramic or wide angle feature to get a fuller shot of the interiors, but the same caution applies – do not make it look like a funhouse! Take your photos from different angles and positions to see what best shows off the unit. Taking photos from corners of rooms opens them up, but also try taking some shots straight on.
Action
Taking the best photos of your rental property starts before you even pick up your camera, as the first order of business is making sure the property is prepared. This means both the interior and exterior. When shooting outside, consider the time of day. You do not want the property dark and hidden in the shadows. Make sure the yard is tidy and freshly landscaped. Consider shooting during the time of year that shows off your property at its best.
 An example is one of our apartment buildings that has a couple of beautiful trees out front. While they are green and full in the summer, providing plenty of needed shade, they block out most of the building when taking a photo of the front. Taking that same photo in the spring or fall, with fewer leaves, allows a much better image of the property.
The same goes for any other exterior shot. If there is a pool, shoot during a bright sunny day, so your future tenants can better imagine enjoying themselves. Make sure any furniture is clean and that the area is swept. If you have outdoor lighting or a fire pit that you want your renters to enjoy in the evening, consider shooting in the late afternoon or around dusk to show off that ambiance.
The same is true of the interior.


Make sure the unit is clean and rent ready. Please do not take photos during rehab or before it is prepared to show. Notice the photos of these similar kitchens, which could you imagine yourself living in? You would not schedule a showing with dishes in the sink, a broom and bucket in the corner, or counter tops full of cleaning supplies. It is the same when taking your photos. Think of your photos as your first showing.
Plan out your photo shoot. Walk into each room and see what the best direction/angle is to shoot the room. Ideally there are multiple good choices. Write these down in a notebook so when you are ready to shoot, you remember your earlier walk through and check the shots off as you go.
Make sure you take photos of closets along with extra storage areas. Get shots of appliances, washer & dryer, and any other amenities your property might have.
It is better to have a few too many photos than not enough. But you do not want to snap away endlessly, so you are overwhelmed in post-processing. It can be frustrating feeling you missed some crucial shots. This is where it is nice to have notes, as I mentioned earlier, that keep you aware of what you still must shoot and what you have already photographed.
Be sure to take advantage of photo editing apps and software (a lot of them are free!). I use Adobe Lightroom which offers simple to complex editing options, access from my laptop, phone, or web, storage and photo organization features (click here for a free trial). Brightness, contrast, saturation, shadows, even some alignment issues are just some of what can be adjusted to improve your photos. Take the extra time to make your photos the best they can be, but be careful not to overdo it. You want to show your rental property at its best, but you also want to be truthful.
As in most projects, proper planning and preparation are vital to their success. I hope these tips help you get ready to start taking great photos of your rental property. A little extra time and care in photographing your rental property will pay dividends in the future.
If you enjoyed this post, please do us a favor and leave a comment below.
Did you find this article informative? You might also like:
Our FREE 10-page Residential Landlord Guide for Placing Your Ideal Tenant
Free Guide: The Top 5 Prescreening Questions We Ask and Why
Let’s Get Social! Follow us on Instagram and like us on Facebook for daily tips about being a residential landlord.
Join our Facebook Group!
Want to know a little more about us? Check out our bio here.
This post contains an affiliate link in which I can earn money for my recommendation.

Related Posts

What Landlords Need to Know About Squatters Rights
By Byron Brown A Landlord’s Guide To Squatters Rights Almost everyone—whether in…
April 1, 2026
Define the Qualities of a Dependable Tenant For Your Property
Provided by AAOA Identify Problem Tenants Before They Move In A small amount of preparation…
April 1, 2026